


Take A Tour
Powerful Tools Right At Your Fingertips
OnCall Provider™ and OnCall Hospital™ are intuitive to use, with powerful features that make scheduling easier than ever before. Take a look below and discover how quick and simple it is to put OnCall to work for your organization.

Administration > My Organization
In this section, you will set up your practice or hospital name, location, and denote your Client Administrator or the person who will manage the call schedule and vacation schedule. You can default the call time period to any time period you choose (defaults to 7 a.m. one day to the next day at 7 a.m.).
You will also choose whether you are a hospital or clinical practice. If you are a hospital, the app provides functionality so that Department Chiefs or their designees can populate the call schedule remotely.
If you would like to have your vacation calendar associated with the call schedule, choose it in this section once you create it.

Administration > Departments
Create as many Departments as you need for your Organization. If anything changes, simply delete the profile.
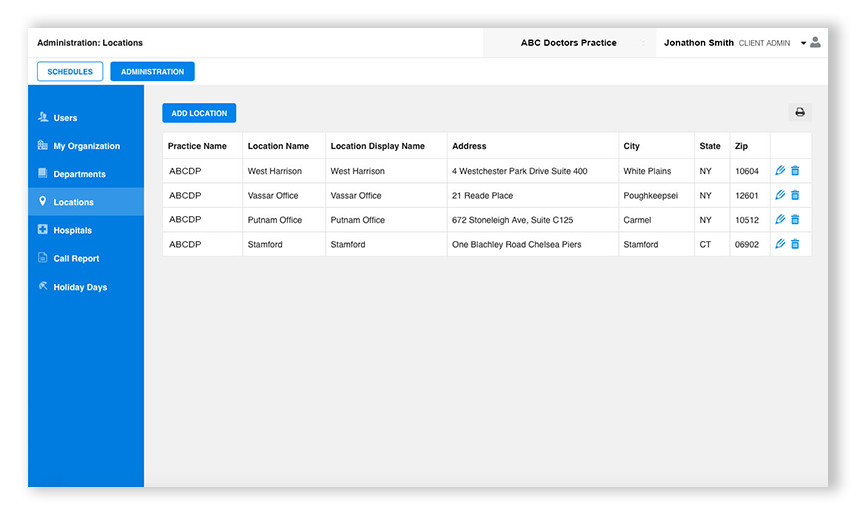
Administration > Locations
Create as many Office Locations as you need for your Organization. If anything changes, simply delete the profile.

Administration > Hospitals
Create as many Hospitals as you need for your Organization where your providers may cover for call. Each Hospital has two Admins associated for notifications in the call schedule for changes. If anything changes, simply delete the profile.
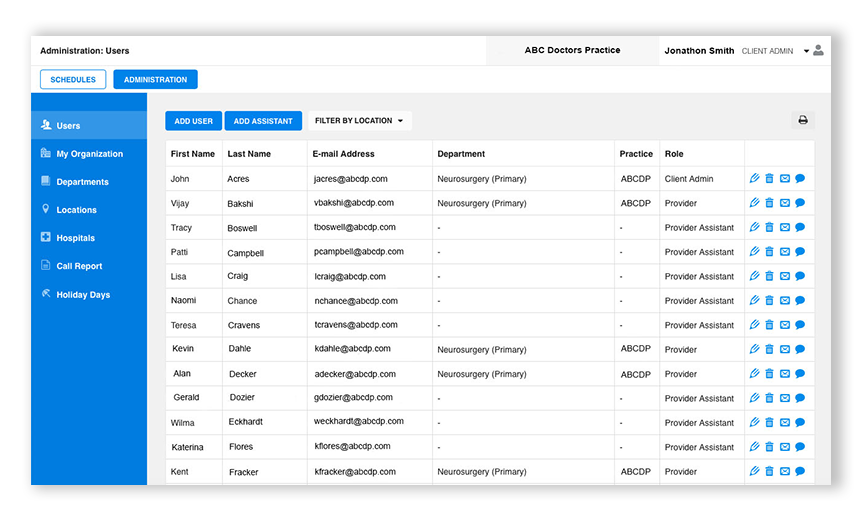
Administration > Users
Users need to be in at least one Department, Location, and Hospital. Create your Departments, Locations, and Hospitals prior to creating each user.
Setting up new users. In this section, you can add as many new users as you would like for your organization. Choose the “pencil” icon to edit and follow the directions. The fields marked with a green asterisk must be filled out.
The Client Admin lists Admins for Office, Locations, and Hospitals in the Administration Panel; each provider can list their Assistant as well.
The text bubble icon on the far right of the User row allows you to quickly and easily text the User, while the envelope icon lets you send them an email.
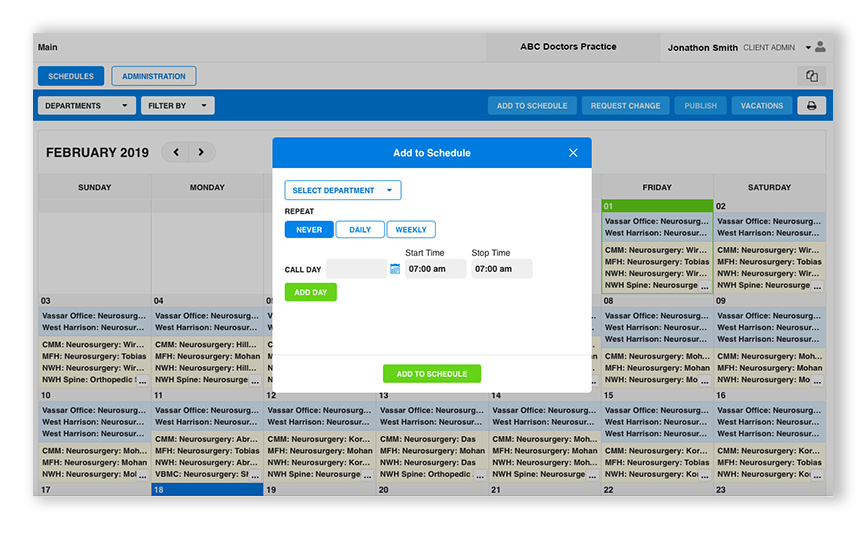
Add to Schedule
Simply choose “Add to Schedule,” select the Department, then select the provider for call. You can adjust the time range to any block of time. You can add multiple providers to cover one 24-hour shift as well.
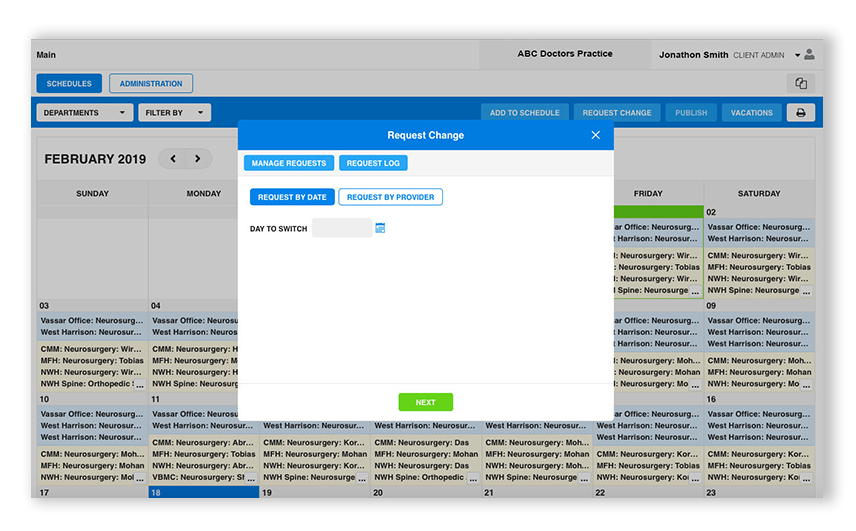
Request Change
A provider can request a change in their call schedule By Date or By Provider.
When choosing By Date, the current on-call provider wishes to switch call with another provider on a specific day. Provider A is on call Monday and would like to switch with Provider B who is on call Wednesday. Provider A makes the request to Provider B; Provider B has 48 hours to accept or deny the request. If accepted, the Providers and Assistants are notified as well as the Client Admin for the site, any Admin for Office Locations where the provider covers, and Admin of any Hospital where the provider covers. If Provider B denies the request, Provider A is notified and they can then ask someone else. All Call Requests are viewable in the Call Log (Calendar View > Request Change and then see left upper corner).
A provider can also request a change to all other providers in their department. If Provider A is on call and it is Friday at 5 p.m. but they need immediate coverage, they would use Request by Provider. Provider A selects Request by Provider, then Department, and all members of the Department are sent the request. Once someone accepts, the schedule is changed starting at the next hour (6 p.m. in this case) and Admins are notified as in above. The call shift defaults from 6 p.m. to the next day at 7 a.m.

Calendar View
Once you log into the app, you will be on the main landing page that shows the monthly calendar. If you click on the day, it expands to show you the current call schedule. You message each provider by clicking the blue text box and the message will go to their cell phone (number listed in User Profile).

Call Report
This function allows you to count the number of days a provider took call over any given time period.
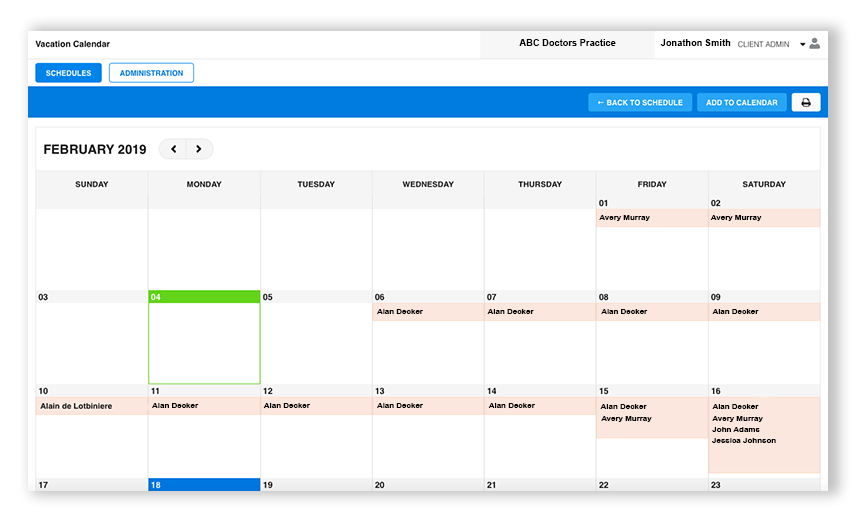
Vacation Schedule
Main Page > Vacations > Add to Schedule
This function allows you to add a provider vacation schedule but only viewable when you choose “Vacations.” If a provider is away and the Client Admin attempts to add them to the call schedule, an error message alerts the Client Admin that the provider is away.
Ready For A Demo?
We know you’ll enjoy the ease and convenience of OnCall scheduling software.
Click here and let’s get started!